Multiple Product Mapping
Why Use Multiple Product Mapping?
By default and on the free plan, you can map all sales to a single income category in QuickBooks (Basic Product Mapping). If you want to map your income to multiple accounts for visibility on your Profit and Loss statement (for example, view the difference in sales between Merchandise and Tickets), you will need to set up multiple product mapping.
If you enable this feature, products will show as line items in the Sales Receipts or Invoices in QuickBooks and the products will be mapped to income accounts. Please note that if you use this feature, you will need to come back to modify your mapping if you add new or modify existing products.
You can find this feature by clicking on "Account Mapping" on the left tab of your Acodei account page. Scroll down to "Premium Features" and click on show next to Multiple Product Mapping. Then scroll down to "Multiple Product Mapping" "Do you want to enable Multiple Product Mapping?" Click yes, and then click on the blue "+Add Product," and you'll be able to set it up.
All products you map will be evaluated from top to bottom on our Multiple Product Mapping list.
Managing Products in QuickBooks Online
To set up multiple product mapping in QuickBooks, you will need to get comfortable with QuickBooks Products. We map to products because it is required for Sales Receipt and Invoice creation.
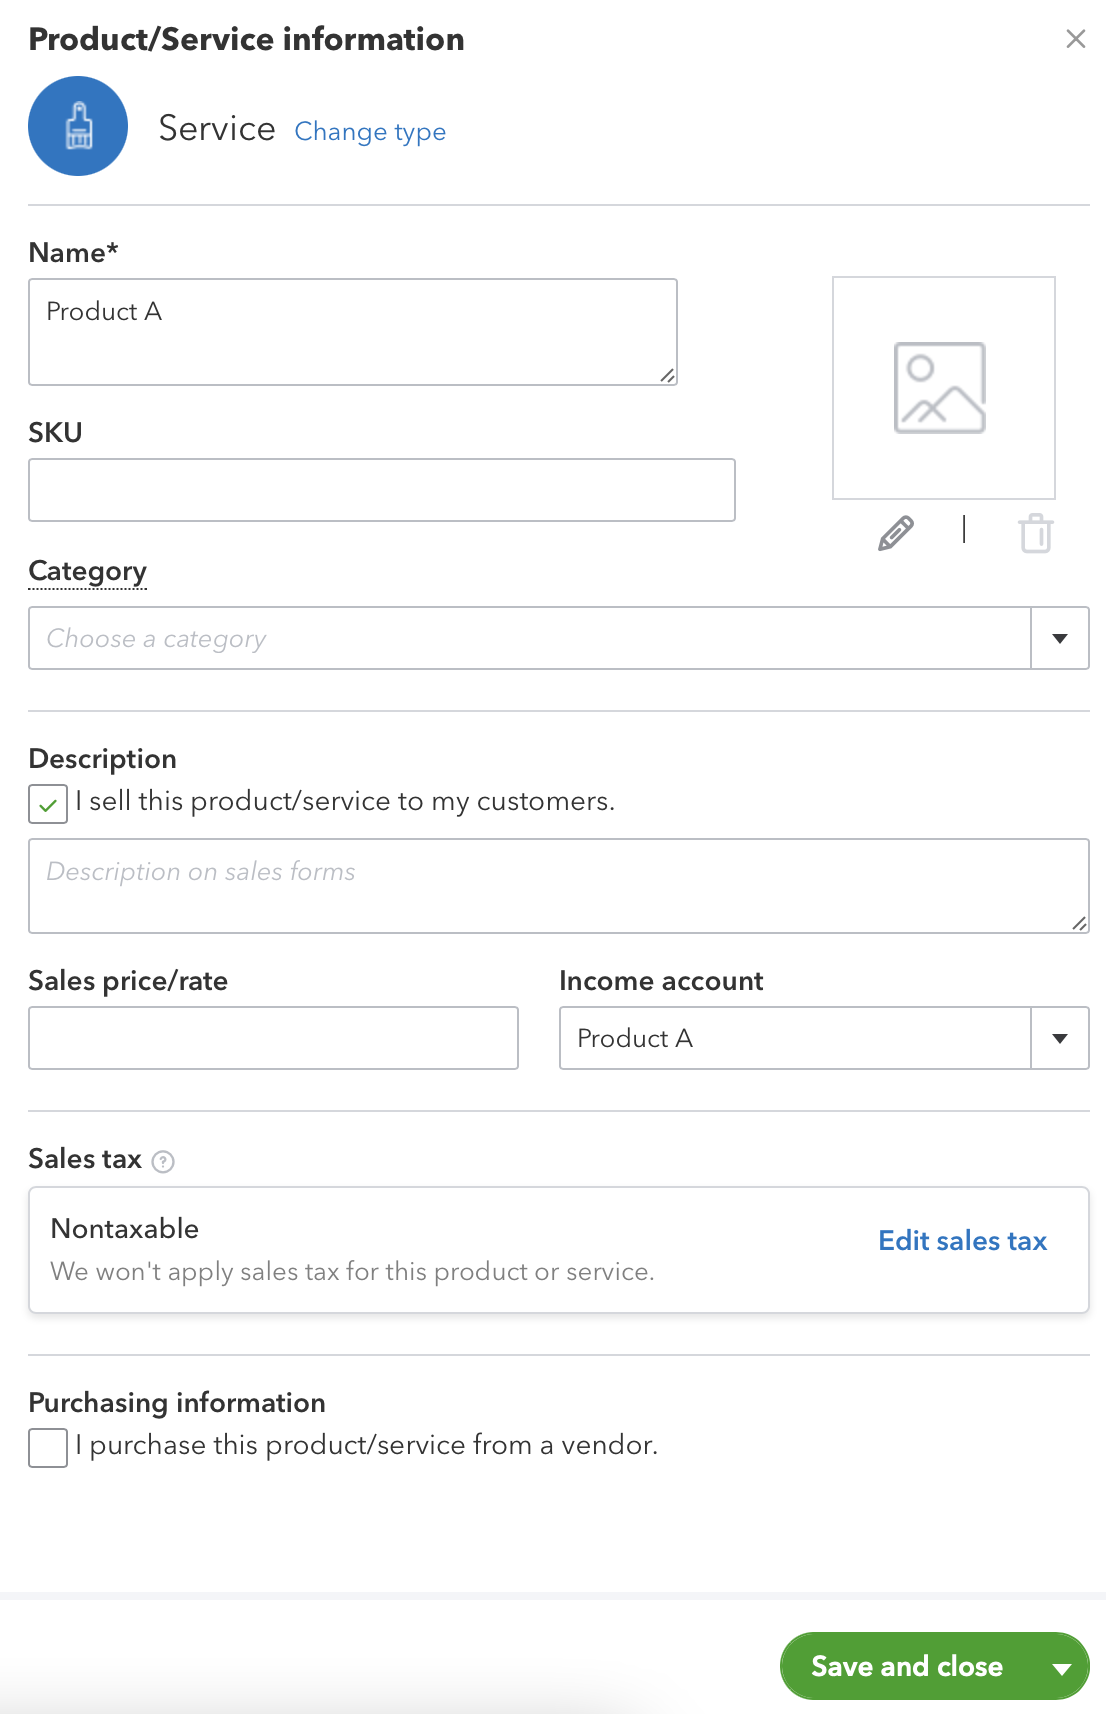
To create a new product, find the tab in QuickBooks called "Products and Services." Inside this tab, create a new product, then make sure the product is mapped to the income account (or asset, expense, or liability) that you want sales for that product to map to.
For US-based companies, make sure the product is set to nontaxable. We can handle sales tax elsewhere. Your product mapping could look something like this:
Currently, there are six different ways to map products:
Description Indicator
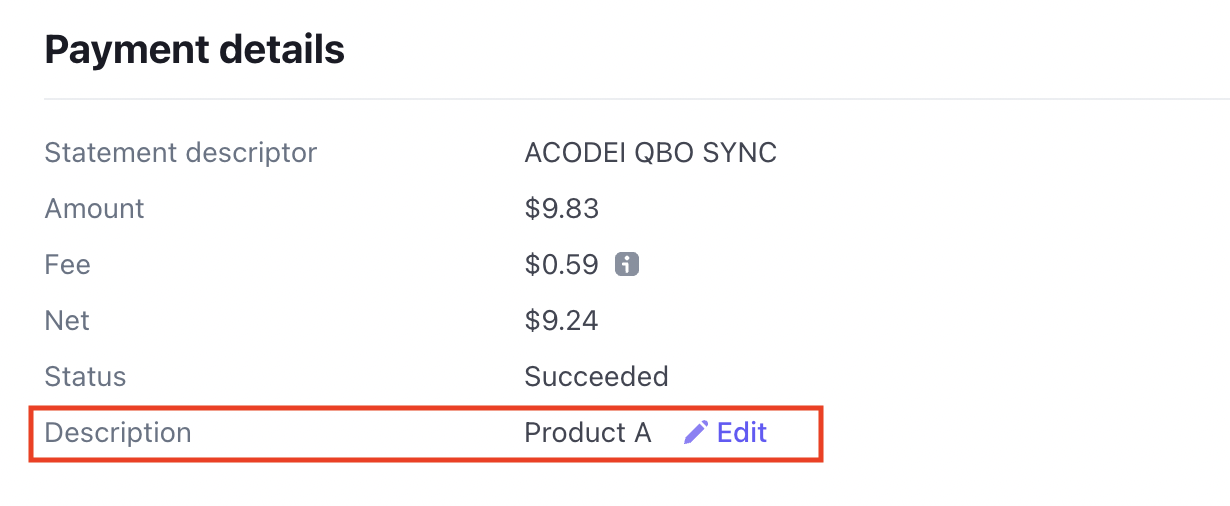
Use the description field in Stripe transactions to match a product in QuickBooks. The description field is currently mapped on the charge, payment intent, and subscription webhooks. Typically, if you see the description field populated, we will be able to capture it. The field is configured through code or by a third-party app connected to Stripe. If yours is blank or has default text, work with your developer or a third-party app to populate the field along with a successful charge.
For all product mapping, but especially relevant for the Description Indicator, we will move through the list from top to bottom. So make sure you list your items accordingly - if you put "Contains - A" at the top of the list and then "Equal to - Product A" at the end of your list, it will match on the first match it encounters. With this in mind, Description mapping is not recommend for highly precise mapping with lots of products because text-based matching has its limits,

Transaction Value
Use the transaction value mapping in unique cases where you want to match products that always have the same value. For example, if you run three tiers of transactions, a $9 tier, a $19 tier, and a $29 tier, you could mark each of these unique values as mapped to a specific product and income account. This type of mapping should not be used unless you have a small number of products with values you don't intend to ever change.
Stripe Product Mapping to QuickBooks with Pricing Tier
Use Stripe Product Mapping to QuickBooks with Pricing Tier if you have a single product with multiple prices in Stripe. For example, if you have a monthly Premium plan and an annual Premium plan, you could set up your mapping like this:

Stripe Product Mapping to QuickBooks with no Pricing Tier
Use Stripe Product Mapping to QuickBooks with no Pricing Tier if you just want to do 1-1 product to product mapping between Stripe and QuickBooks. This will provide the most exact method of product mapping and is the least prone to error, but it does require you to keep up on new product offerings and modifications.
Stripe Metadata Mapping
Usually, with the help of a developer, you can create metadata on charges like in this example:

Using the Stripe Metadata Mapping option, you can map Keys (the value on the left) and Values (the value on the right) to indicate which QuickBooks product you want to map. This can be helpful in a number of situations, especially if the combination of multiple elements necessitates a more complex connection than description mapping can provide alone.
Stripe Account Mapping
For users with more than one Stripe account connected, you have the option to map according to which Stripe account a transaction comes through. For example, if you have two Stripe accounts - Stripe account A and Stripe account B, you could say all of Stripe account A's transactions go to a product for Consulting, and all of Stripe account B's transactions go to the Merchandise product.